
evaluate() is the right entry point for 95% of cases. For the other 5% (wiring evaluations into an existing pipeline, streaming datapoints from a long-running job, scoring production traffic after the fact) use the lower-level LaminarClient.evals API, or call the HTTP endpoints directly if you’re not on a Laminar SDK.
When to use this
Reach for the manual API when you need to:- Create an evaluation now and append datapoints to it over hours or days, as work completes.
- Register a datapoint in the UI before the executor runs, so a row is visible while the run is still in progress.
- Run the executor in one process and write scores from another (for example, an async judge that posts results back later).
- Score production traces without re-running the call: save the executor output and scores against a new datapoint.
- Write evaluations from a language or runtime with no Laminar SDK. The SDK methods below are thin wrappers over four HTTP endpoints you can call directly: see the HTTP API reference.
evaluate().
The three-phase pattern
The manual API is designed around three distinct moments in an evaluation’s lifecycle. Call them in order:- Create the evaluation with
create_evaluation/create. Returns aneval_id. Do this once per run. - Pre-register each datapoint with
create_datapoint. Returns adatapoint_id. A row appears in the UI immediately, even though the executor hasn’t run yet. - Update the datapoint with
update_datapoint: link it to a trace, then (once the executor and evaluators finish) write the executor output and scores.
Setup
Build executor and evaluator spans
Wrap the executor and each evaluator inobserve() with the matching spanType. The evaluation UI uses EXECUTOR and EVALUATOR to know which spans hold the input, output, and score for each row.
Create the evaluation and datapoints
Open the evaluation up front, then loop over the test data. For each row, pre-register the datapoint, run the executor inside anEVALUATION span, and write scores back once the evaluators finish.
The two SDKs link traces to datapoints in slightly different places. TypeScript accepts
traceId on createDatapoint only, so call it from inside the EVALUATION span and pass Laminar.getTraceId() there. Python’s update_datapoint accepts trace_id, so you can register the datapoint before the span opens and link the trace once it’s running. The Python pattern is what you want when the row needs to be visible before you know which trace will own it.Renaming or re-tagging a finished run
A long-running job often doesn’t know everything about itself when the run is created: the final status, the git SHA it ends up testing, how many rows it processed.update (TypeScript) / update_evaluation (Python) writes the evaluation’s name and metadata after the fact, any time after create:
metadata, it replaces the stored object wholesale rather than merging: include the keys you want to keep, as the examples above do. The group cannot be changed.
Decoupling the executor from the scorer
Becauseupdate_datapoint can be called any time after create_datapoint, executor and scorer can live in different processes. A common shape:
- A worker runs the agent, produces a trace, and calls
update_datapointwithexecutor_outputand an emptyscores={}dict. - A judge process reads
executor_outputfrom the dataset or from the agent’s output store, scores it, and callsupdate_datapointagain with the filled-inscores.
datapoint_id. The UI updates in place each time.
Backfilling without running the executor
For pure backfills (rows you already have outputs and scores for, no live executor), loopcreate_datapoint + update_datapoint over the pre-scored rows:
POST /v1/evals/{eval_id}/datapoints accepts executorOutput and scores on each point, so fully-scored rows land in one batched call.
No EVALUATION span is opened, so no trace is attached. The row shows data, target, executor_output, and scores, which is enough for the list view, progression chart, and side-by-side comparison. Use this when you want the numbers in Laminar but don’t need per-row transcript drill-down.
HTTP API reference
All four endpoints authenticate with a project API key as a Bearer token and take a JSON body. Base URL ishttps://api.lmnr.ai on Laminar Cloud, or your app-server’s HTTP origin (including port) when self-hosting.
Headers
All request and response field names are camelCase. A bad or revoked key returns
401.
The examples below assume:
traceId on the datapoint to get per-row transcripts.
Create an evaluation
POST /v1/evals
200 with the created evaluation:
id: every later call is scoped to it.
Update an evaluation
POST /v1/evals/{eval_id}
200 with the updated evaluation in the same shape as create, or 404 when the id doesn’t exist in the project.
Fields you leave out are unchanged, so you can rename a run without touching its metadata. metadata is replaced wholesale rather than merged: send the whole object, including keys you want to keep. groupId cannot be changed.
Add datapoints
POST /v1/evals/{eval_id}/datapoints
200 with the evaluation id.
Update a datapoint
POST /v1/evals/{eval_id}/datapoints/{datapoint_id}
200 with the datapoint id. Scores are merged into the existing scores, so a second call adding a new score name keeps the earlier ones. Call it as many times as you like against the same datapoint_id; the UI updates in place.
Result
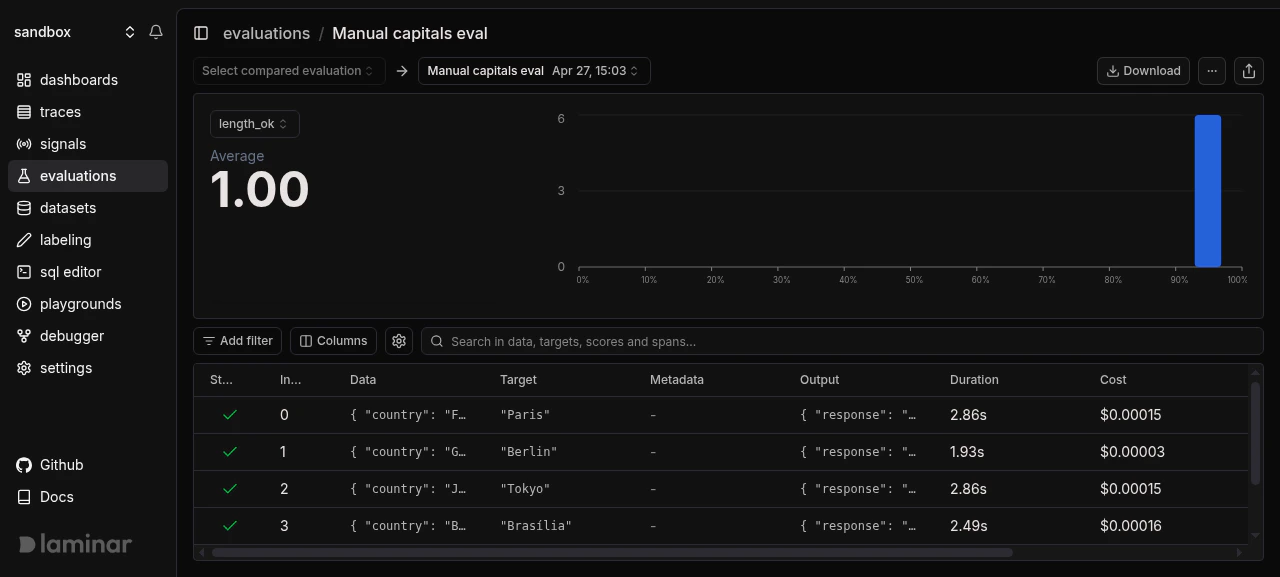
Manual evaluations show up in the same evaluations list, progression chart, and comparison UI asevaluate() runs. Groups, per-datapoint deltas, and CSV export all work the same way.
Manual evaluation detail page. Progression chart and datapoint table match what evaluate() produces
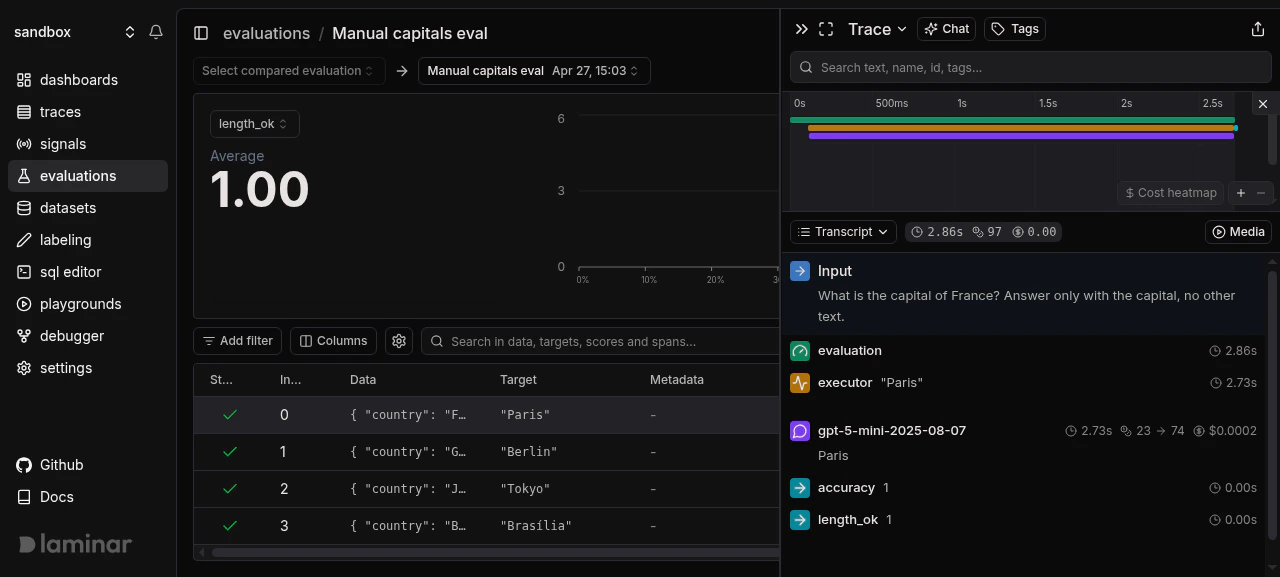
EVALUATION root, EXECUTOR, and EVALUATOR nesting you’d expect from evaluate().
One datapoint's transcript: EVALUATION root, executor, the gpt-5-mini call, and accuracy / length_ok scores
Next steps
Quickstart
The high-level
evaluate() API, which is the right starting point for most cases.Compare runs
Group manual runs so you can compare them like any other evaluation.
Concepts
The datapoint / executor / evaluator / group model the manual API maps onto.
SDK reference
Full parameters for
LaminarClient.evals methods.